Restaurant Food Photography: How to Shoot Photos That Sell Dishes
Learn simple, practical food photography techniques to make your menu dishes look irresistible online without hiring an expensive crew.
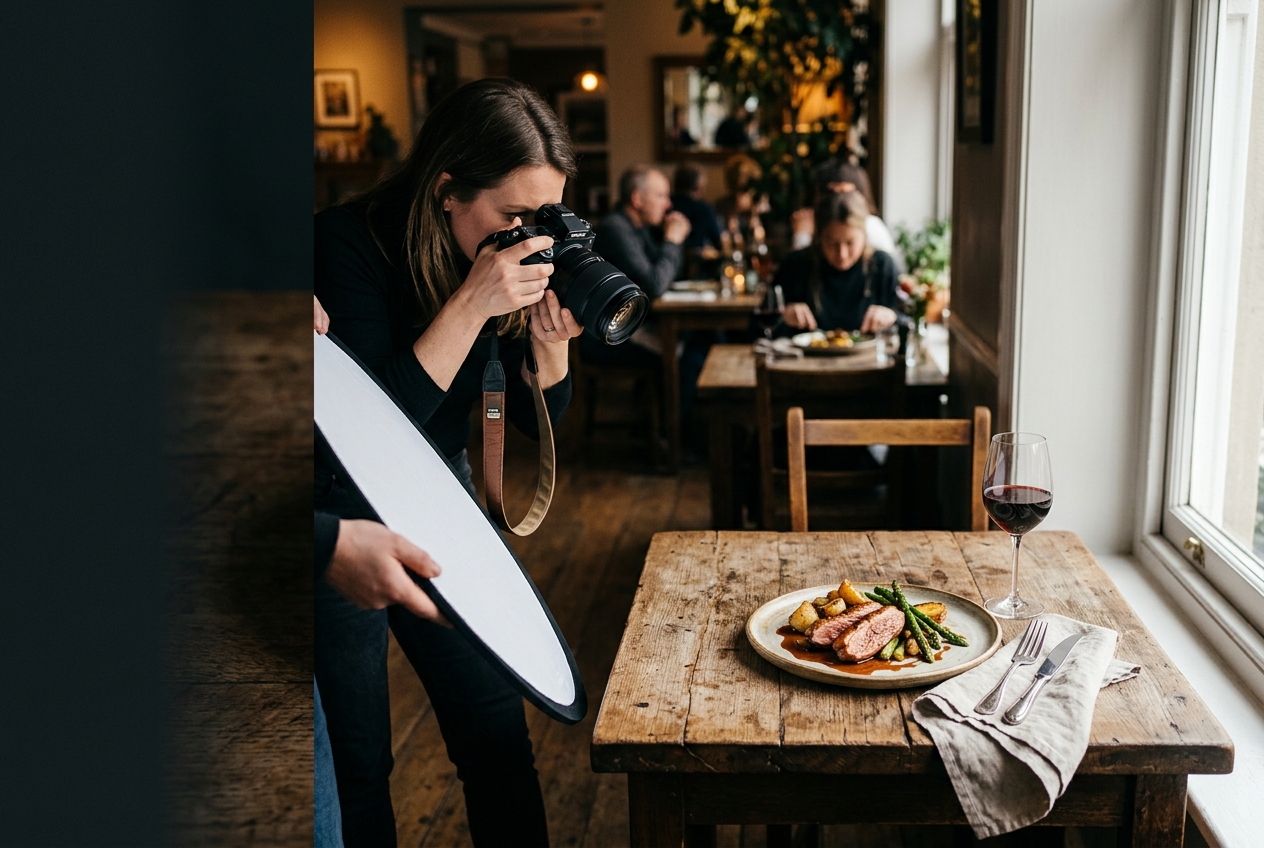
When a hungry diner finds your restaurant online, your photos often make the decision before your menu copy does. A bright, detailed picture of your signature dish can create appetite and confidence. A dark, blurry phone photo can make even a great meal look forgettable.
The good news is that restaurant food photography does not require a full studio, an expensive camera, or a professional crew. With a clean lens, decent natural light, and a few repeatable habits, you can create photos that work on your website, Google Business Profile, social media, and online ordering pages.
This guide covers practical restaurant food photography tips you can use on your next shoot, whether you are photographing one new special or building a complete library of menu images.
Why Restaurant Food Photography Matters
Food photos do more than decorate a website. They help a potential customer decide what to order and what kind of experience to expect.
Strong restaurant photography can help you:
- Make signature dishes easier to discover and remember.
- Increase confidence for first-time customers.
- Give your online menu more visual appeal.
- Show the quality and portion of a dish before someone orders.
- Create reusable content for your website, Google Business Profile, email, and social channels.
Your photos do not need to look like a national advertising campaign. They need to look accurate, appetizing, and consistent with the food you actually serve.
1. Start With Your Most Important Dishes
Do not begin by photographing every item on a large menu. Start with the dishes that help the business most.
Choose a short list that includes:
- Your signature or bestselling dish.
- A popular appetizer or shareable item.
- One representative dish from each major menu category.
- A visually distinctive special.
- A dessert or drink that increases the average order.
This gives you useful coverage without creating a huge editing project. If you have a 50-item menu, eight to twelve excellent photos are usually more valuable than 50 rushed ones.
Before the shoot, write down the dish name, any important ingredients, and where the photo will be used. That simple list keeps the session focused and makes it easier to name image files and write accurate alt text later.
2. Use Window Light Whenever Possible
Natural window light is the easiest way to improve restaurant food photography. It is soft, inexpensive, and usually more flattering than the overhead lights in a dining room.
Set the dish on a table near a large window, but keep it out of direct midday sunlight. Direct sun creates harsh highlights and deep shadows. Light coming from the side or from behind the dish creates texture in sauces, crusts, and fresh ingredients.
Turn off competing overhead lights if they make the food look yellow or green. Mixed light sources are difficult to correct because each bulb may have a different color.
If the shadows are too dark, place a white menu, foam board, or clean white towel on the opposite side of the dish. It will bounce some light back onto the food without making the image look artificial.
3. Clean the Camera Lens and Use the Rear Camera
A fingerprint on a phone lens can make every image look hazy. Wipe the lens with a clean microfiber cloth before you start, and check it again if you move around the restaurant.
Use the rear camera instead of the front-facing camera. It normally has better image quality. Avoid digital zoom, since it reduces detail. Move the phone closer to the dish or crop the image later.
Tap the screen on the main subject to set focus. On most phones, you can hold that area to lock focus and adjust exposure by sliding your finger up or down. Slightly lowering the exposure can protect bright areas such as white plates, fried toppings, or glossy sauces.
4. Choose the Right Camera Angle
There is no single best angle for every dish. Choose the angle that shows why the food is appealing.
Overhead photos
A top-down view works well for pizzas, bowls, tables filled with shareable dishes, and plates with strong geometric shapes. Keep the camera level with the table and check that plates are not being cut off at the edges.
Three-quarter photos
A 45-degree angle is a reliable choice for burgers, sandwiches, plated entrees, and desserts. It shows the top of the dish while also revealing height and layers.
Eye-level photos
A lower angle emphasizes height. Use it for stacked burgers, tall cakes, layered drinks, and dishes with a dramatic finishing element. Keep the background simple so the food remains the subject.
Take two or three angles of each important dish. You can decide later which version works best for the website, menu, or social post.
5. Keep the Background Simple
The background should support the dish, not compete with it. A clean table, a neutral placemat, or a small section of your dining room is often enough.
Remove receipts, condiment bottles, dirty dishes, paper towels, and anything that does not belong in the finished image. If the restaurant has a recognizable material, such as a wood table or tiled counter, use it sparingly as part of the brand.
Use props only when they help explain the experience. A fork, a napkin, fresh herbs, or the drink that normally comes with the dish can add context. Too many props make the photo look staged and can confuse customers about what is included.
6. Make the Food Look Fresh, Not Fake
The best styling is honest preparation. Photograph the dish shortly after it leaves the kitchen, while the garnish is fresh and the food has the texture customers can expect.
A few small adjustments can help:
- Wipe smudges from the rim of the plate.
- Replace wilted greens or uneven garnish.
- Add sauce or finishing oil just before the photo.
- Make sure melted cheese and crisp toppings still look fresh.
- Use the actual serving portion, not an oversized promotional version.
Avoid adding ingredients that are not part of the order. If customers receive a different dish than the photo promises, the image creates disappointment instead of confidence.
7. Compose for Both Websites and Social Media
Take photos with enough space around the dish so they can be cropped into different shapes. A horizontal image may work well in a website section, while a vertical crop may be better for a story or reel cover.
Keep the primary dish near the center, but do not crop too tightly. Leave room for responsive layouts, text overlays, and mobile screens. Capture a few wider images that show the table or dining environment, along with close-ups that show texture.
Do not add large text, prices, logos, or promotional stickers directly to every food photo. Keep the original image flexible. Add campaign-specific text later when you know where the image will be used.
8. Edit Lightly and Consistently
Editing should make the photo look closer to the real dish, not turn it into something customers will never receive.
A simple edit usually includes:
1. Crop and straighten the image.
2. Adjust brightness so the food is easy to see.
3. Correct the white balance so plates look white and ingredients look natural.
4. Add a small amount of contrast and sharpness.
5. Reduce distracting shadows or highlights.
6. Export a web-friendly copy and keep the original file archived.
Use the same general approach across the set. If one image is warm and moody while another is bright and blue, the menu will feel inconsistent.
Avoid heavy filters, extreme saturation, and excessive blur. Customers want an appealing preview, not a misleading one.
9. Prepare Photos for Your Restaurant Website
Large camera files slow down mobile pages. Before uploading, resize images to the largest display size your website needs and compress them without making the food look soft.
Use descriptive file names such as spicy-chicken-tacos.jpg instead of IMG_4832.jpg. Write useful alt text that describes the image naturally, for example, "Three spicy chicken tacos with lime and cilantro on a white plate." Do not stuff location keywords into every alt attribute.
A strong restaurant website should also make the menu easy to read as text. Food photos are persuasive, but they should support clear dish names, descriptions, prices, hours, location details, and an obvious order or reservation button.
10. Build a Repeatable Photo Workflow
The biggest benefit comes from a process you can repeat when the menu changes. Create a small shot list and use the same table, window, camera settings, and editing style when possible.
A practical workflow looks like this:
| Step | What to do |
|---|---|
| Plan | Select priority dishes, gather props, and choose a quiet time |
| Prepare | Clean the lens, wipe plates, and set up near a window |
| Shoot | Take wide, three-quarter, and close-up versions of each dish |
| Select | Keep the sharpest, most accurate image for each item |
| Edit | Crop, straighten, correct color, and compress consistently |
| Publish | Add descriptive file names, alt text, and the photos to the right pages |
| Review | Check the images on a phone and replace dishes that no longer match |
Keep a folder with original files, edited web copies, and a simple list of dish names. That makes seasonal updates much easier.
Common Restaurant Food Photography Mistakes
Using flash straight at the plate
Direct flash creates hard shadows and shiny hotspots. Start with window light or use a diffuser if you need additional light.
Photographing under mixed lighting
Daylight and warm ceiling bulbs can make the same dish show two different color temperatures. Turn off unnecessary lights and use one consistent light source.
Showing a dish customers cannot order
A photo of an old special or unavailable garnish reduces trust. Review menu images whenever recipes, portions, or plating change.
Uploading huge original files
Uncompressed images can slow down mobile visitors. Resize and compress before they reach the website.
Photographing only close-ups
Close-ups show texture, but wider images communicate portion, setting, and atmosphere. Use a mix of both.
Do You Need a Professional Food Photographer?
A professional photographer can be worth the investment when you are opening a new location, launching a major rebrand, or creating a large library of images for advertising. They bring lighting equipment, styling experience, and a consistent visual system.
You do not have to wait for a professional shoot to improve your website. A well-lit phone photo of a real signature dish is usually better than a dark image that has been sitting on a social media page for three years.
Start with your top dishes, learn what customers respond to, and upgrade the photo library when the return justifies it.
Put Better Food Photos to Work
Good restaurant food photography is one part of a useful online presence. Your images should lead customers into a fast, mobile-friendly website where they can read the menu, confirm your hours, get directions, and place an order without hunting.
At Free Restaurant Website, we build custom websites for independent restaurants at no cost. We can organize your menu, use your best photos, and create a site that helps hungry customers take the next step without monthly website fees or platform ads.
Request your free restaurant website when you are ready to put your restaurant online with a site that is clear, fast, and built around real customer decisions.
Free Website Offer
Get a modern website for your restaurant with zero cost and no monthly fees
We design and host your menu, hours, and photos on a custom domain. Keep 100% of your food sales, with optional online ordering when you are ready.